A computer is made by more components or more parts. From those parts, motherboard is main parts. In a short word, we can't think a computer without motherboard. All accessories are set on motherboard, like Processor, RAM, AGP card, Sound Card, Mouse-Keyboard etc. However, now Motherboard Replacement is narrated in below.
At first, choose a branded motherboard from market. And after set the motherboard into desktop casing. It is simple. At first, follow like this Screenshot. The steel plat is Casing Back Panel. It is gotten with new motherboard. However, set this Casing Back Panel in the back side of casing strongly.
Motherboard Replace: Action-1

To do or to complete this replacement is needed a screw driver or Nut driver. Please, check all screws and corresponding standoffs of casing, like this screenshot. You have to verify all standoffs are installed properly.
Motherboard Replace: Action-2

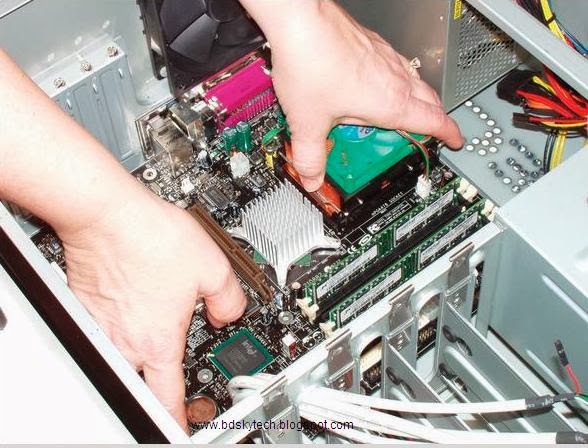
Now, take the motherboard from the packet and boundless to the motherboard very carefully. It is essential speech that you have to set RAM and Processor before installed into casing. Please, install RAM and Processor very carefully on the motherboard. If the installing would be finished then whole motherboard installed to the desktop casing very carefully.
You have to verify all standoffs are installed properly. Please follow picture:Action-3,Action-4 and Action-5.
Motherboard Replace: Action-3

Motherboard Replace: Action-4
Motherboard Replace: Action-5

Now, you should to set the motherboard and all screws are needed to tie by screw driver. You can get help by Action-6 picture.
Motherboard Replace: Action-6

This screenshot is very needed to set all switch in front of casing. If keep your eye deeply to the motherboard then you face a cable panel to set Reset Button and Start Button, that means the panel has Hard Drive Active LED,Single Colored Power LED,Dual Colored Power LED,Power Switch,Reset Switch. Please set all switch very sincerely.
Please, follow Action-7 and Action-8.
Please, follow Action-7 and Action-8.
Motherboard Replace: Action-7

No comments:
Post a Comment